


 marketing@expomax.com.cn


7 Pro Tips for Using SEG Lightbox at Your Next Event
Feature | Benefit |
|---|---|
Modularity | Easy to change and add parts |
Tool-free assembly | Fast to set up and take down |
Accessories available | More ways to make it unique |
You can make cool displays for every event with less worry.
Key Takeaways
Put your SEG lightbox where many people walk. This will help you get more visitors. Use more than one display to make it easier to see.
Pick bright colors and strong contrast for your lightbox graphics. This helps people see your message and makes it stand out.
Try setting up your lightbox before the event. Knowing how to put it together saves time and helps you feel less stressed.
Strategic SEG Lightbox Placement
High-Traffic Areas
You want people to notice your seg lightbox. Put your lightbox where most people walk. Main aisles and entrances are good spots. These places have lots of people passing by. You can use more than one display to show off different booth areas. Try putting your lightbox up high so people see it from far away. When you know where people walk, your booth gets more attention.
Put your lightbox along busy walkways.
Place displays near entrances so more people see them.
Use more than one display to make special spots.
Sightlines & Visibility
Your lightbox should be easy to see from all sides. Make sure nothing is in the way. Pick the right profile for your display. The 120mm profile is best for big displays and bright light. SEGQUICK's modular options let you change your setup for any booth size. Put your lightbox where people can see it from far away. Use lights to make important areas stand out and bring people in.
Tip: Put your lightbox so people see your graphics before they get to your booth.
Avoiding Obstructions
Do not let things block your lightbox. Keep displays away from tables, chairs, or other booth items. Make sure your lightbox fits well with your booth setup. You want people to see your graphics clearly. SEGQUICK's modular system lets you move your lightbox easily. This helps you keep your booth neat and free from obstacles.
Keep displays away from furniture.
Move displays for clear views.
Use modular options to fit any booth shape.
Lightbox Display Design Tips
Bold Colors & Contrast
You want your lightbox display to pop at any event. Start with bold colors and strong contrast. Bright, saturated colors grab attention and make your graphics stand out. High contrast between your text and background helps people read your message fast. Check out these design principles:
Principle | Description |
|---|---|
High Contrast | Use colors that stand out from the background for clear, sharp messages. |
Color Saturation | Pick vibrant colors to catch the eye and keep people interested. |
Strategic Placement | Put your display where it won’t blend in with other visuals. |
Choose bold, sans-serif fonts for your seg lightbox. These fonts stay easy to read, even with backlighting.
Readability at Distance
People often see your lightbox from far away. Make sure your message is clear. Use big letters—about 1 inch tall for every 10 feet of viewing distance. Keep your main message in the center of your lightbox display so nothing gets cut off. Try hanging your display higher or using taller structures to help people spot your booth from across the room.
Tip: Place your most important words in the middle 60% of your graphic for best results.
Brand Consistency
Your lightbox display should always match your brand. Use the same colors, logos, and style every time. SEGQUICK's high-quality graphics and even lighting make your brand colors look just right. When your display looks sharp and consistent, people remember your brand better. Even light across the whole display gives your booth a premium feel and helps you stand out at events.
Optimizing Lightbox Illumination
Getting your lightbox to shine just right can make your booth look amazing. SEGQUICK uses energy-efficient LED backlighting, which means you get bright, even light while using about 50% less energy than traditional lighting. This helps you save money and helps the planet, too.
Test Brightness
You want your lightbox display to look bright and even from every angle. Start by testing the brightness before your event. Use a lux meter to check the light at different points on your display—center, corners, and sides. This helps you spot any dark spots or uneven lighting. A good rule is to keep the brightness uniform, so your graphics pop and your brand looks professional.
Tip: Even illumination makes your display stand out and keeps your colors vivid and sharp.
Adjust for Ambient Light
Every event space has different lighting. Sometimes the room is bright, sometimes it’s dim. Adjust your lightbox to match the space. Try setting the color temperature between 6000K and 6500K for clear, crisp visuals. If you can, test your lightbox display in a space with lighting like your event venue. This way, you know your graphics will always look their best.
Troubleshoot Issues
Before the big day, do a test run of your seg lightbox. Set it up just like you will at the event. Check for any problems, like shadows, color issues, or parts that don’t line up. Make sure your display is stable and your graphics are clear. Fixing small issues now means you’ll have a smooth setup and a professional look when it counts.
A well-lit lightbox display grabs attention fast. It makes your brand memorable and helps people find your booth easily. When your display looks bright and even, you show off your products and message in the best way possible.
Quick Lightbox Setup
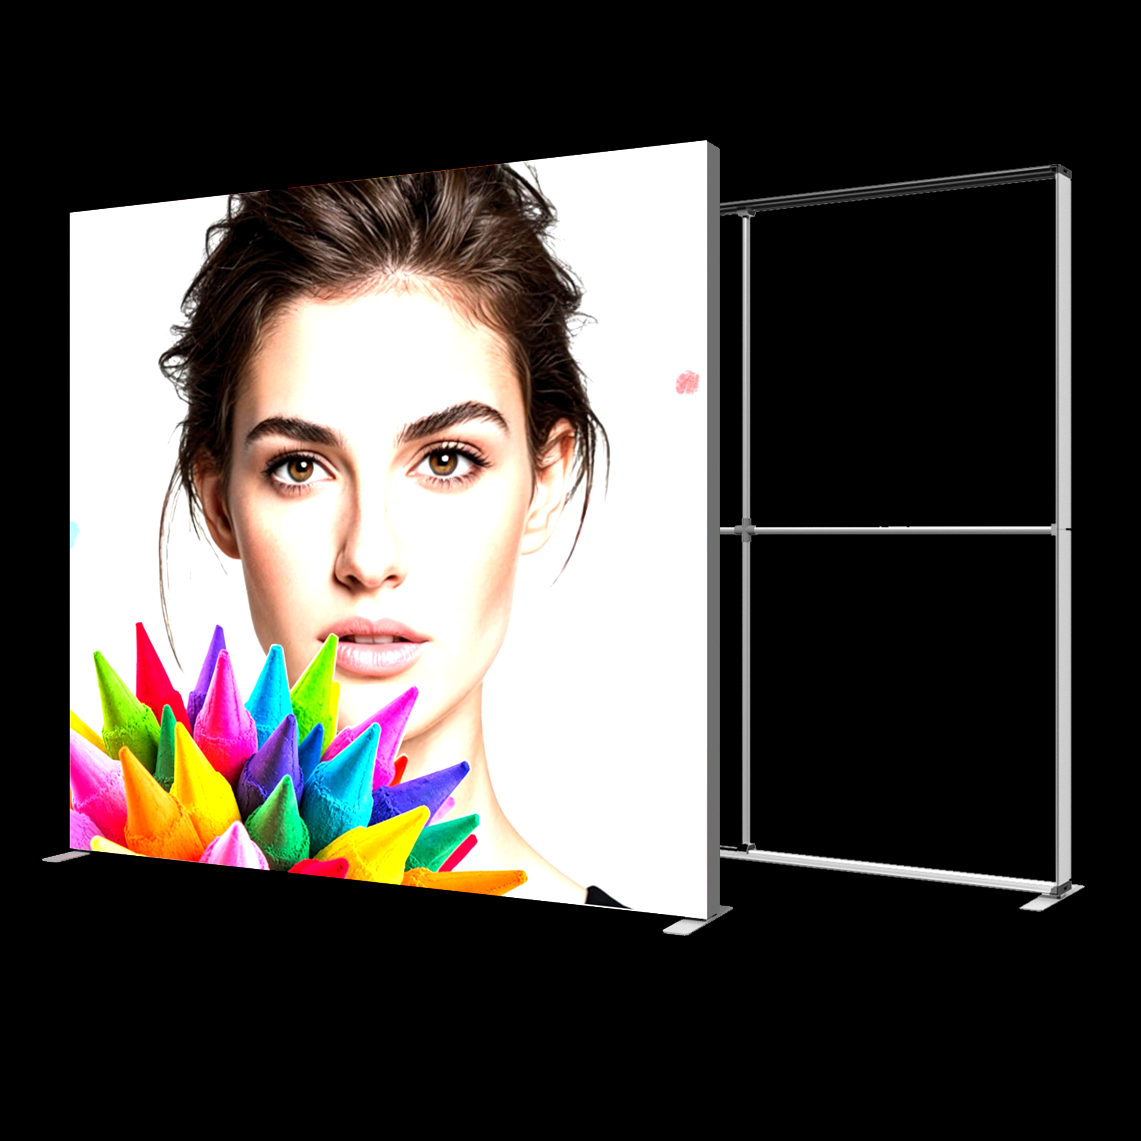
Getting your lightbox ready should not feel stressful. You want your booth to look great, and you want to save time. SEGQUICK makes this easy with tool-free assembly and smart connectors. You can set up your seg lightbox without searching for tools or worrying about missing parts.
Review Instructions
Start by reading the instructions that come with your lightbox display. The guide shows you each step, so you know what to do. Look at the pictures and match the parts. If you have questions, check the quick-start guide or ask a teammate for help. When you know the steps, you feel more confident.
Practice Assembly
Try putting your lightbox together before the event. Practicing helps you get faster and spot any tricky parts. You can see how the connectors snap together and how the graphics fit. Here’s how much time you can save with a little practice:
Configuration | Setup Time |
|---|---|
Single-sided 1000 mm Lightbox | ~5 minutes |
Double-sided 1000 mm Lightbox | ~10 minutes |
Large Modular / Island Booth | 1–2 people, under 1 hour |
You can set up a small display in just a few minutes. Even a big lightbox display takes less than an hour with two people. That means more time to focus on your booth.
Essential Tools
You do not need special tools for SEGQUICK. The connectors and frames snap together by hand. Bring a soft cloth to clean your graphics and a checklist to make sure you have all your display parts. When you keep things simple, your lightbox setup goes smoothly every time.
Maintaining SEG Graphics
Taking care of your SEG graphics keeps your lightbox looking sharp at every event. You want your display to stand out, so let’s talk about how you can store, clean, and install your graphics the right way.
Proper Storage
You should always store your SEG graphics with care. This helps prevent wrinkles and damage. Here’s what you can do:
Roll your graphics instead of folding them.
Use a paper core and a hard box for extra protection.
Make sure your graphics are dry before you put them away.
Store them in a cool, dry place away from heat and sunlight.
Don’t stack heavy items on top of your rolled graphics.
These steps help your graphics stay smooth and ready for your next event.
Cleaning Methods
Keeping your graphics clean is easy. Check out this table for the best ways to clean different types of SEG fabric:
Cleaning Method | Fabric Type | Instructions |
|---|---|---|
Machine Wash | Dye-sublimated SEG fabric | Use delicate cycle with cold water and gentle detergent. Tumble dry on low. |
Spot Clean | UV printed SEG fabric | Use a damp cloth with mild soap. Don’t scrub or soak the fabric. |
SEGQUICK uses durable materials, so you can clean your graphics without worry.
Timely Installation
Install your graphics early for the best results. A snug fit in the frame keeps your graphics smooth and wrinkle-free. High-quality materials keep your colors bright and your graphics looking new. The silicone gasket holds everything in place, so your display stays perfect all day.
Tip: Install your graphics before the event starts. This gives you time to check for any issues and fix them fast.
Modular Lightbox Accessories
Add Counters & Shelves
You want your booth to look nice and neat. Counters and shelves help you do this. With SEGQUICK, you can add these parts fast. Counters give you a spot to talk to visitors or show products. Shelves let you show brochures, samples, or awards. You can mix these parts to match your booth style. Here’s what you can add:
Accessory Type | Description |
|---|---|
Monitor Mounts | Attach screens for videos or slideshows |
Brochure Holders | Keep flyers and pamphlets handy |
Shelving | Store and show products or samples |
Counters | Create a spot for conversations and demos |
Integrate Tech (TVs, Charging)
Tech makes your booth more fun. You can add TVs for videos or live demos. Wireless charging lets visitors charge their phones while they visit. SEGQUICK has RGB LED lights, so you can change colors to match your brand. Electrical outlets help you use other devices. Custom accessories let you build a booth that fits your needs.
Feature | Benefit |
|---|---|
Dynamic Visual Content | Grabs attention and keeps people interested |
Wireless Charging | Makes your booth more useful for visitors |
RGB LED Lights | Lets you set the mood and match your branding |
Electrical Outlets | Powers up your tech and keeps things running |
Custom Booth Layouts
You can make a booth that stands out. SEGQUICK modules snap together quickly, so you can build any shape you want. Tool-free assembly saves time and money. Flexible connectors let you change your layout for each event. You get a booth that fits your space and your style.
Feature | Benefit |
|---|---|
Modular and Versatile | Lets you design your booth your way |
Fast Installation | Gets your booth ready in just seconds |
Tool-Free Assembly | Makes setup easy for everyone |
Flexible Configurations | Adapts to different spaces and needs |
Tip: Try mixing modules for a bigger booth or a cool layout. You can make your lightbox display fit any event.
Efficient Dismantling & Transport
Packing up after an event can feel like a race against the clock. You want to keep your lightbox safe and ready for the next show. Here’s how you can make the process smooth and stress-free.
Label Components
Start by labeling every part of your display. Use color-coded stickers or simple tags. This helps you find each piece fast when you set up again. You won’t waste time guessing where things go. Make a checklist of all the parts. Check them off as you pack. This way, you know nothing gets left behind.
Use Protective Cases
Protective cases keep your graphics and frames safe during transport. You have a few great options:
Accessory bags use reinforced and padded materials. They protect connectors, fabric graphics, and small parts from bumps.
Light-box cases are tough and built for travel. They handle different environments and are easy to use.
Many cases come with wheels, so you can move heavy items without lifting.
The inside of each case is organized. Packing and unpacking become quick and simple.
These cases use eco-friendly materials and strong construction for long-lasting safety.
Tip: Always use the right case for each part. This keeps everything in top shape for your next event.
Schedule Tear-Down
Plan your tear-down before the event ends. Give yourself enough time to pack carefully. Rushing can lead to lost or damaged parts. Work with your team and follow your checklist. When you stay organized, you protect your investment and make the next setup even easier.
You now have seven pro tips to make your event booth shine. SEG Lightboxes like SEGQUICK give you quick setup, easy transport, and bold displays. Check out these features:
Feature | Benefit |
|---|---|
Portability | Carry with ease |
Quick Setup | Save time |
Make a checklist and get ready to wow your crowd!
FAQ
How do I set up a SEGQUICK lightbox without tools?
You snap the frame together by hand. The connectors fit easily. You do not need any tools. Setup takes just a few minutes.
Can I use SEGQUICK lightboxes for different exhibitions?
Yes! You can change the layout for each event. The modular design lets you build displays that fit any space or booth size.
Tip: Practice setup at home before your next exhibition.
What accessories can I add to my SEGQUICK booth?
You can add counters, shelves, TV mounts, and wireless charging. These accessories help you create a booth that stands out and meets your needs.








View More(Total0)Comment lists